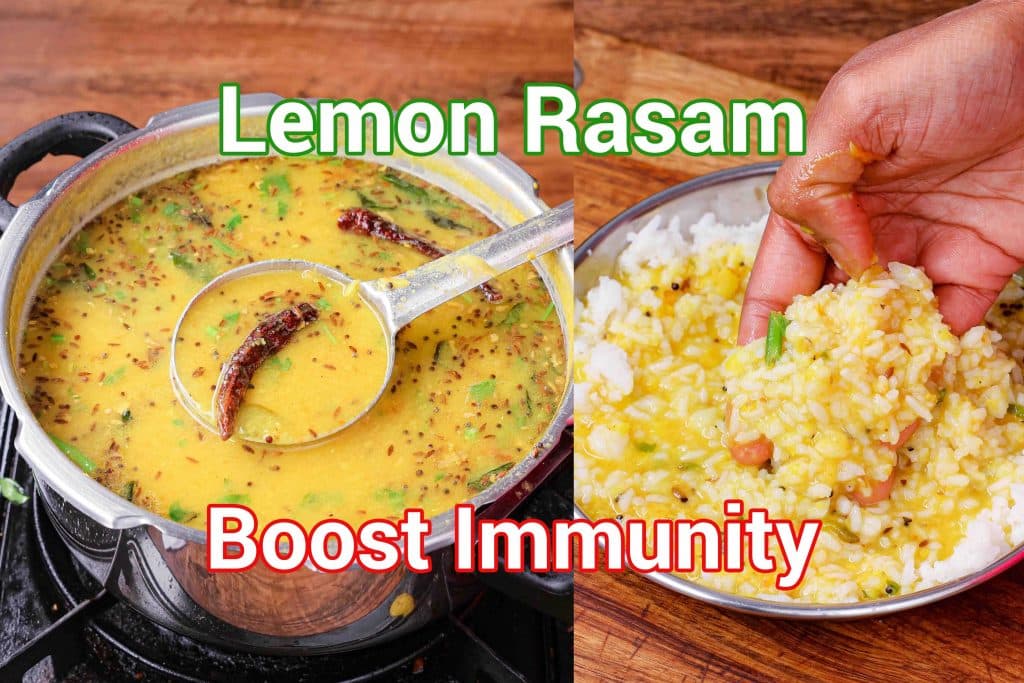
Lemon Rasam Recipe | Nimbu Rasam Recipe | South Indian Lemon Rasam with detailed photo and video recipe. This is a simple, healthy, and tasty rasam recipe that is ideally served with hot steamed rice. However, it can also be served as soup as an appetizer and even for common cold problems. It is typically served as an appetiser just before the meal for better digestion and taste enhancement.

Lemon Rasam Recipe | Nimbu Rasam Recipe | South Indian Lemon Rasam with step-by-step photo and video recipe. Perhaps one of the most common and underrated rasam recipes is prepared in most South Indian households. This thin and watery rasam can be prepared within minutes, yet it delivers a fantastic taste and is typically served with rice and papadum.
In Kannada, we typically refer to this recipe as kat saru or Nimbu Saaru, and it is served with rice just before sambar. But this rasam recipe is very well popular in other states of Southern India. It is referred to as elumichai rasam or nimmakaya rasam in Tamil and Telugu, respectively. Lemon rasam is believed to be one of the South Indian Brahmins’ delicacies, and hence, it is even prepared for auspicious or religious events. However, I personally prefer this rasam recipe and cook whenever I feel I have something light with no fancy creamy recipes. In addition, it is also prepared as an appetiser and served just before the sambar rice meal.
Furthermore, here are some essential tips and suggestions for a perfect lemon rasam recipe. Firstly, Nimbu rasam should always be thin and watery and not thick like the sambar or dal recipe. I prefer to add cooked and mashed to or dal in this recipe, which gives this rasam a slightly thicker consistency and good taste. Secondly, always add the lemon juice or lime juice once the gas or stove is turned off. Otherwise, the rasam may turn bitter if added while boiling. Lastly, avoid reheating lemon rasam once cooked, which may again lead to bitterness in the taste. It is best served when prepared freshly and served immediately.
Finally, do visit my other Rasam Recipes Collection with this post Lemon Rasam. Particularly, Mysore rasam, Udupi rasam, tomato rasam, kokum rasam, pepper garlic rasam, tomato onion rasam, coconut milk rasam, horse gram rasam, beetroot rasam, and rasam powder recipe. In addition, do visit my other recipes collection board like,
About Lemon Rasam
This is an easy yet healthy rasam or thin soup recipe made with lentil water and a hint of fresh herbs and spices. Once Lemon Rasam or Nimbu Rasam is prepared, it is topped with a generous amount of lemon juice, hence the name lemon rasam. It is typically served just before the meal as soup or as an appetiser with rice before the sambar rice meal. It also carries medicinal health benefits, and hence, it is served during indigestion or constipation problems.
There are many different ways to make this simple Lemon Rasam recipe. The most common way is to make it with leftover lentil-cooked water, which gives it a thin, watery consistency. However, it can also be made with moderate thickness by adding the cooked lentils to diluted water. The other way is to make it without lentils; it is cooked with water, herbs, spices, and lemon topping.
Video Recipe
Recipe Card for Lemon Rasam

Lemon Rasam Recipe | Nimbu Rasam Recipe | South Indian Lemon Rasam
Ingredients
for pressure cooking:
- 1 cup toor dal
- 1 tomato, chopped
- 5 chilli
- 1 inch ginger, grated
- few curry leaves
- ½ tsp turmeric
- 1 tsp salt
- 1 tsp oil
- 3 cup water
other ingredients:
- 3 cup water
- ½ tsp salt
- ½ tsp pepper, crushed
- 2 tbsp coriander, chopped
- ½ lemon
- !for tadka:
- 2 tbsp ghee
- 1 tsp mustard
- 1 tsp cumin
- pinch hing
- 2 dried red chilli, broken
- few curry leaves
Instructions
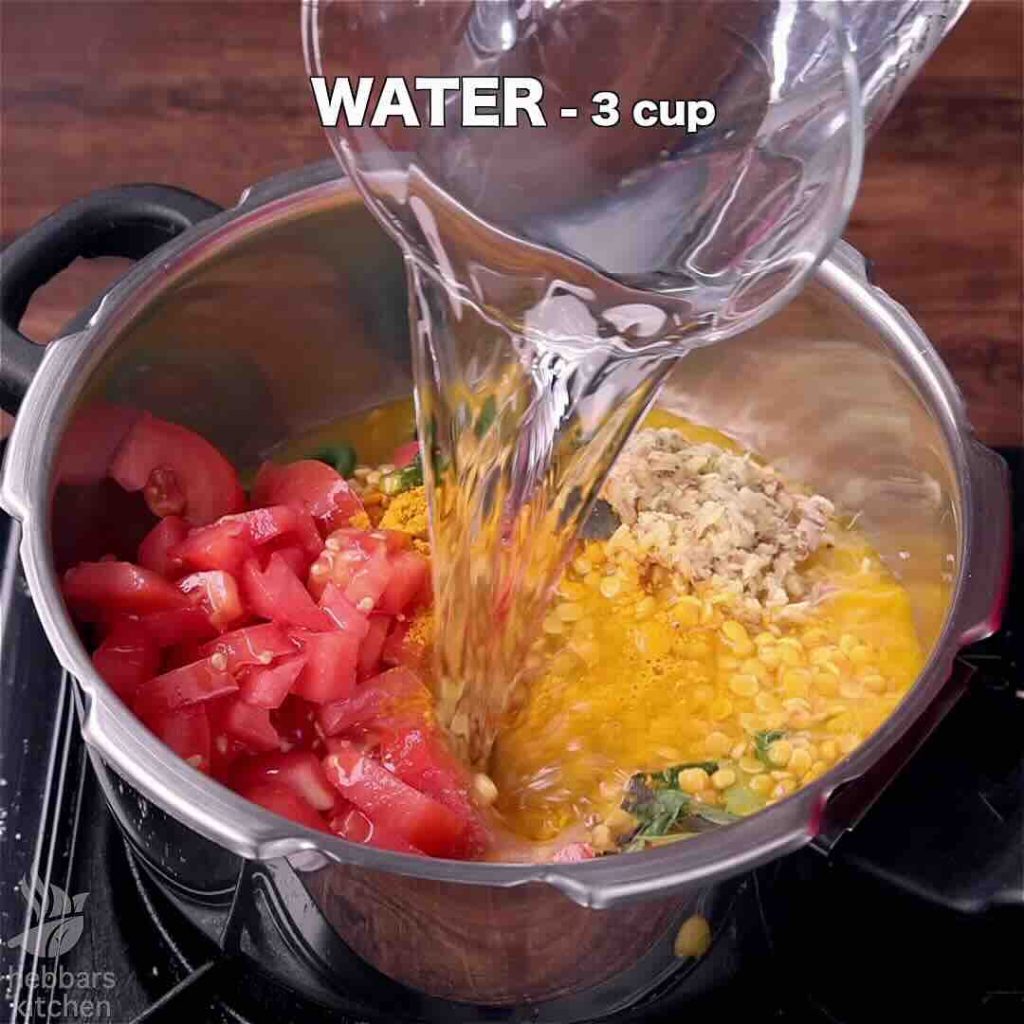
- Firstly, in a pressure cooker take 1 cup toor dal, 1 tomato, 5 chilli, 1 inch ginger and few curry leaves.
- Also add ½ tsp turmeric, 1 tsp salt, 1 tsp oil and 3 cup water.
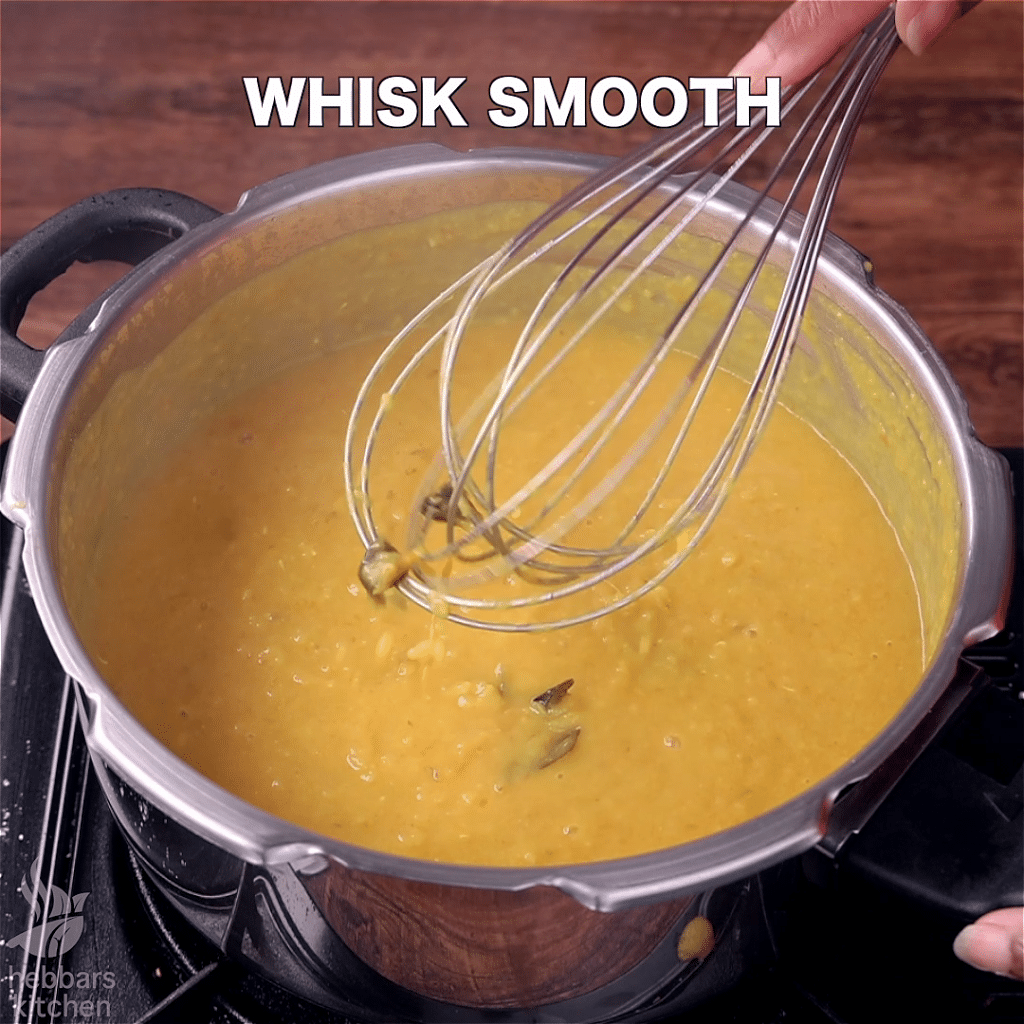
- Pressure cook for 5 whistles or until the dal is cooked well.
- Whisk the dal to make it a silky smooth texture.
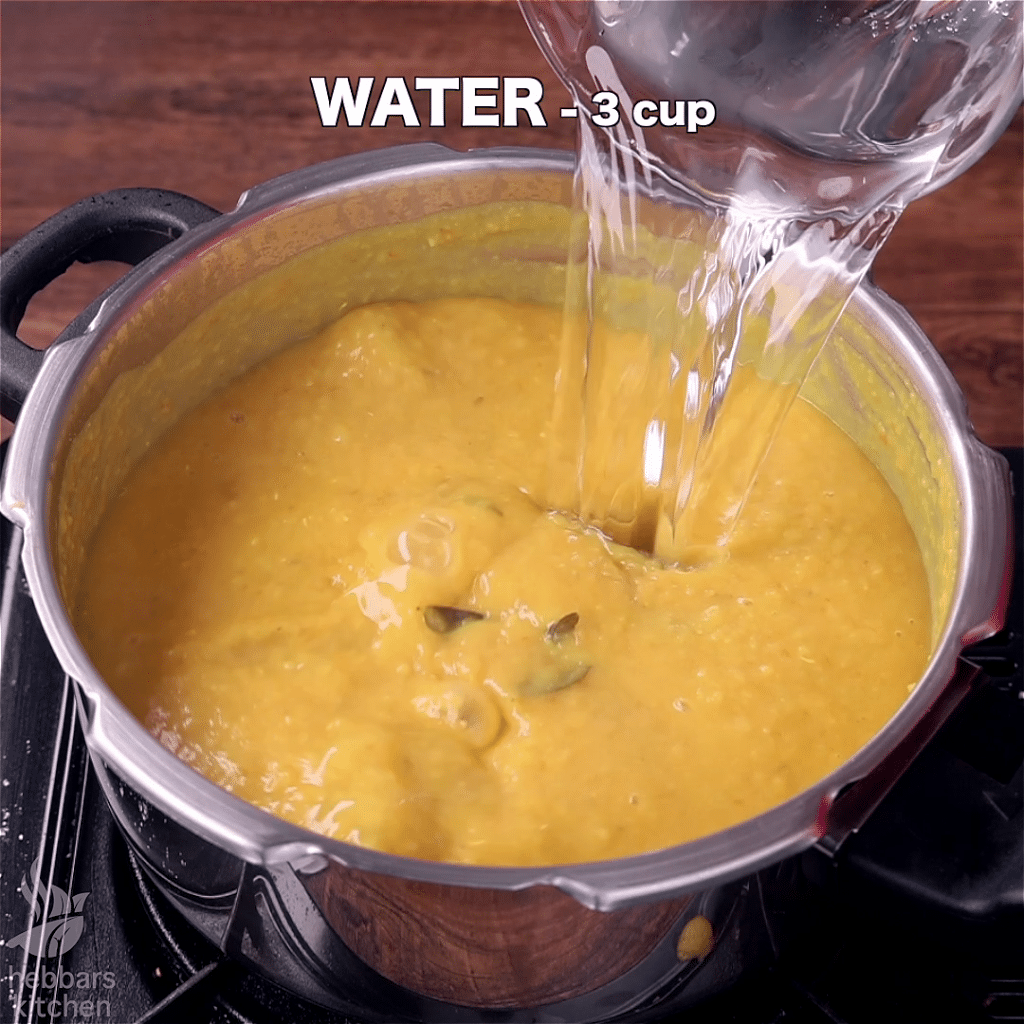
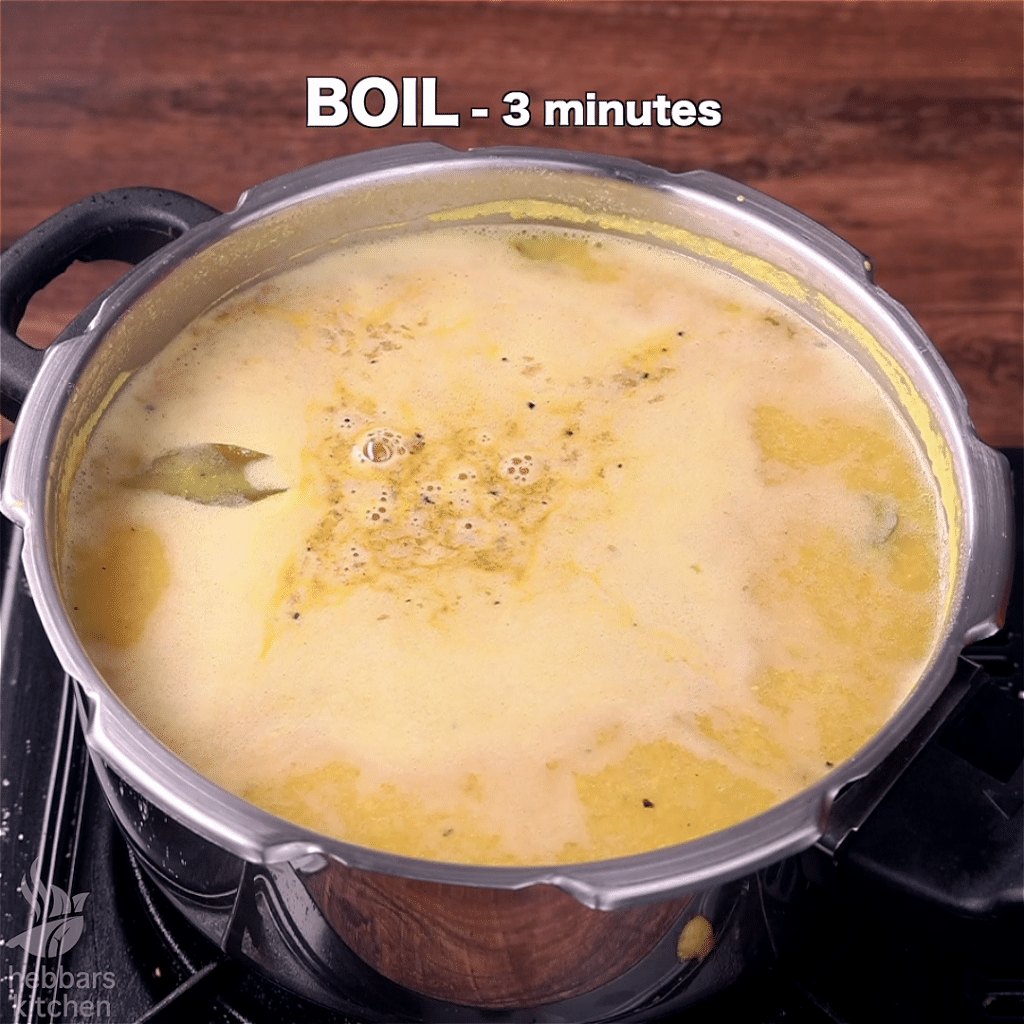
- Pour in 3 cup water, ½ tsp salt and ½ tsp pepper. Mix well.
- Boil for 3 minutes or until flavours are well absorbed.
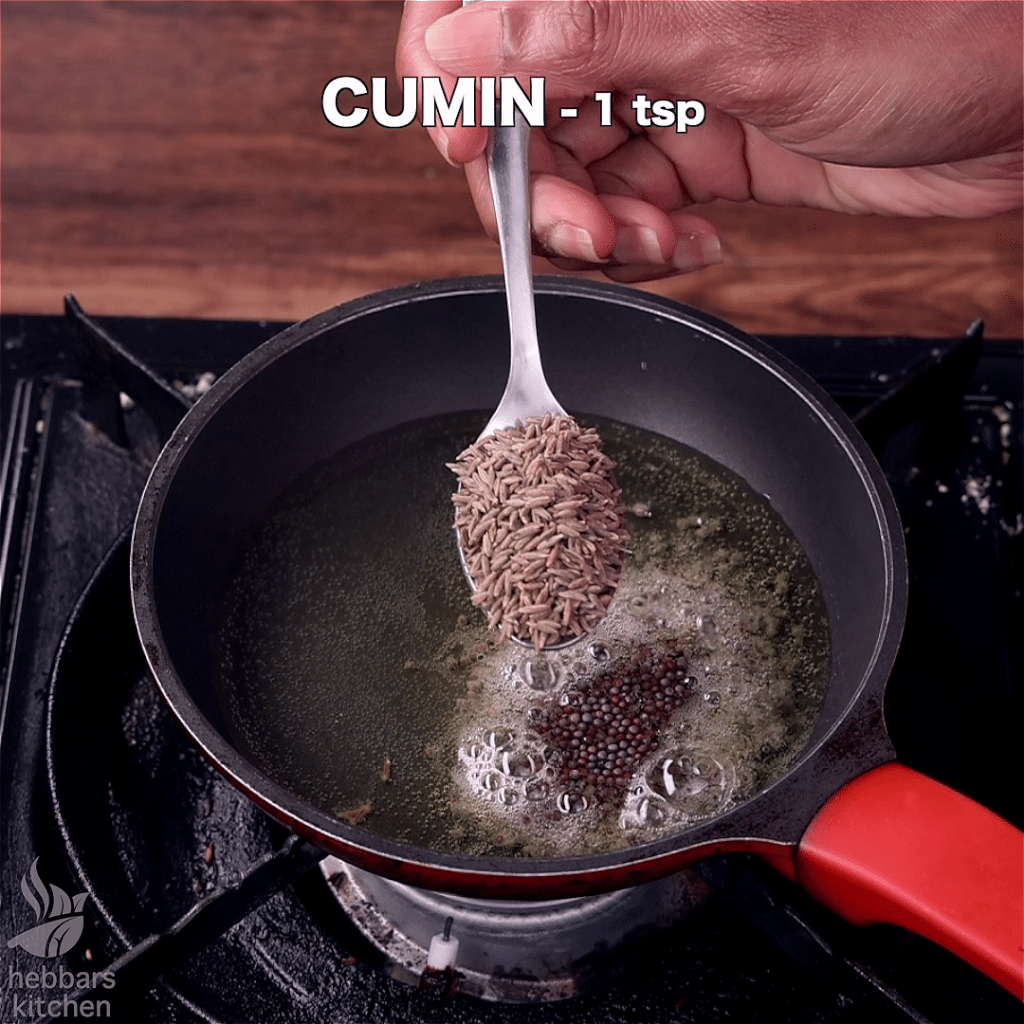
- Now to prepare the tempering, heat 2 tbsp ghee. Add, 1 tsp mustard, 1 tsp cumin, pinch hing, 2 dried red chilli and few curry leaves.
- Splutter the tempering and pour over rasam.
- Also add 2 tbsp coriander, ½ lemon and mix well.
- Finally, enjoy Lemon Rasam Recipe with hot steamed rice.
Nutrition
How to make Lemon Rasam with Step-by-step Photos
- Firstly, in a pressure cooker take 1 cup toor dal, 1 tomato, 5 chilli, 1 inch ginger and few curry leaves.

- Also add ½ tsp turmeric, 1 tsp salt, 1 tsp oil and 3 cup water.
- Pressure cook for 5 whistles or until the dal is cooked well.
- Whisk the dal to make it a silky smooth texture.
- Pour in 3 cup water, ½ tsp salt and ½ tsp pepper. Mix well.
- Boil for 3 minutes or until flavours are well absorbed.
- Now to prepare the tempering, heat 2 tbsp ghee. Add, 1 tsp mustard, 1 tsp cumin, pinch hing, 2 dried red chilli and few curry leaves.
- Splutter the tempering and pour over rasam.
- Also add 2 tbsp coriander, ½ lemon and mix well.
- Finally, enjoy Lemon Rasam Recipe with hot steamed rice.


Notes
- Firstly, make sure to make the rasam slightly watery consistency for enhanced flavour.
- Also, turn off the flame and lemon juice to prevent rasam from turning bitter.
- Additionally, whisk the dal really well to get silky smooth texture.
- Finally, Lemon Rasam Recipe tastes great when flavours of ginger is also present.
Great Recipe
I have tried this with little bit (1/4 th cup) of of coconut milk along with lemon juice
Just try.. gives a great taste
Thanks a lot Nithin for sharing this variation 🙂 I will certainly try it
Most welcome , the key here is not to boil / cook coconut milk
Thanks once again Nithin
Oh yes correct, I absolutely agree on the spam thng!! I can see it now 😉
Hey an observation, I can clearly see wen u added lemon juice in the video however the same is missing from the recipe card & images , hence ppl asking u this question.
Anyways i loved ur recipe gonna try it soon.
hello Nii, thank you very much for bringing this to my attention. I have added the necessary information now.
Hey i cant see my comments
i think you should see it now. comments should be approved by me before it gets displayed. otherwise it would be fill of spam comments.
This is a real hit in our home.Thanks for sharing this recipe.
you are welcome Raji
Comments are closed.